Why do some LED street lights look purple or blue? The color can reveal a real equipment problem, but it does not identify the cause by itself. Many white LEDs create light with a blue chip and a phosphor layer that converts some blue light into warmer colors. If that layer cracks, separates, or deteriorates, more blue light may escape. At night, one lamp can then appear violet beside nearby white fixtures.
Lighting researcher Dr. John Bullough has studied how people perceive light and how lighting performs in real environments. A careful paraphrase of his evidence-based approach is: “Appearance alone cannot diagnose a light source.” That distinction matters. A purple-looking lamp may have a failing phosphor coating, while a phone camera’s white balance can make an otherwise ordinary light look unusually blue. Look twice. Compare it with nearby lamps, and check whether the color remains visible to the naked eye.
This guide explains how to distinguish a likely fixture fault from a viewing or camera effect. It also covers practical clues: a sudden color change, several affected lamps from the same installation, or a visible difference across the street. These signs can help, but they are not proof. Even experienced observers can misjudge color under dark skies; I would not diagnose a fixture from one photograph alone. A proper assessment may require a close inspection and measurements of the light’s spectrum. Understanding those limits helps residents, maintenance teams, and property managers describe the problem clearly and decide what to check next.
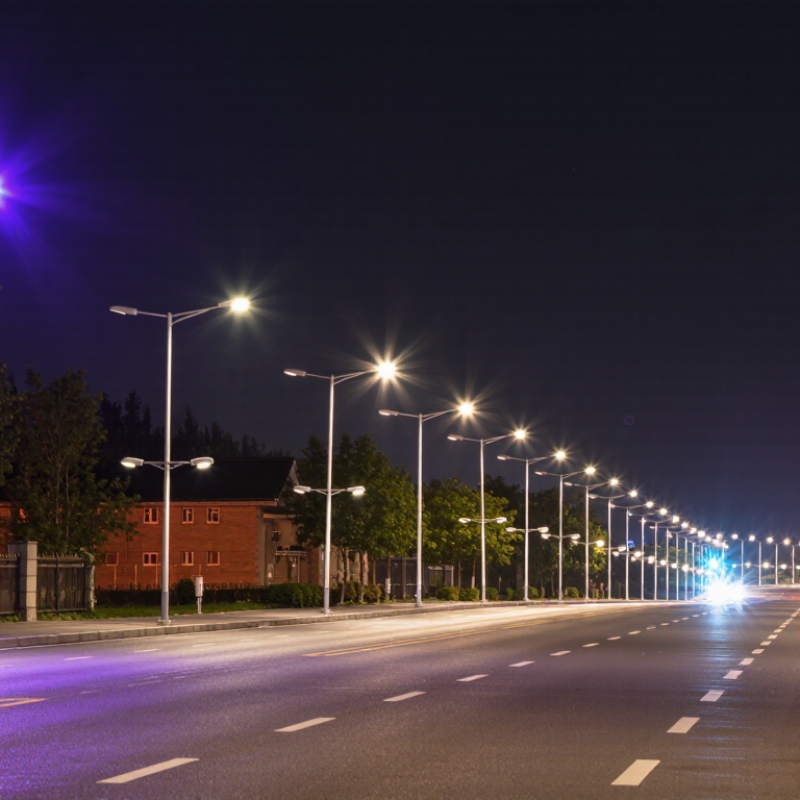
Stand beneath the fixture and look directly at the lit road, not only at a phone image. Does the pavement and nearby concrete appear violet to your eyes? Ask another observer too; human color perception varies, and one person’s impression is not a measurement. If the purple cast is visible from several angles, record the pole number, time, and affected area. A persistent tint may indicate a luminaire fault, including a change in the LED’s phosphor layer, but color alone cannot confirm the cause. Check nearby fixtures for comparison.
If the light looks ordinary in person but blue or purple in a photograph, suspect the camera first. Automatic white balance, exposure, and sensor response can shift LED colors, especially in night scenes with few neutral surfaces. CIE 15:2018, the international colorimetry standard, describes standard-observer color matching across 360–830 nanometers; a camera does not reproduce that observer exactly. Take a second image with automatic white balance disabled, then compare it with what you see directly. Better evidence comes from a field inspection using a calibrated spectroradiometer to record spectral power distribution and chromaticity. Phone photos are useful clues, not proof. I have seen this distinction missed when crews judge a fixture from a single image.
A blue-violet streetlight can come from its LED spectrum, not necessarily a failing lamp. In many phosphor-converted LEDs, a blue pump produces a narrow spectral peak near 440–460 nm, while phosphor adds a broader yellow-green-to-red band. Check the luminaire’s spectral power distribution, or SPD, rather than judging color by eye. A calibrated spectroradiometer can reveal a sharp peak near 450 nm against the wider phosphor output. Small measurement errors matter.
The U.S. Department of Energy’s CALiPER street-lighting evaluations used measured optical data to compare LED luminaires, showing why product appearance alone cannot establish spectral performance. Compare the suspect lamp’s SPD with a nearby neutral-looking fixture, measured at the same distance and angle. A peak around 450 nm is expected in many designs; an unusually strong peak, weak phosphor output, or a changed spectrum may make the lamp seem bluer.
Look closely. Lens aging, dirt, camera white balance, and surrounding surfaces can also distort what you see. I would not diagnose color shift from a phone photo alone. Record the model’s correlated color temperature and SPD, then repeat the measurement after cleaning the lens; the evidence may still be imperfect.
White LED street lights usually create white light by combining a blue LED chip with a phosphor layer. The phosphor absorbs part of the blue output and re-emits it across broader wavelengths. If that conversion weakens, the fixture can look distinctly blue or violet. The color alone does not prove a failed component.
With the luminaire switched off, inspect its lens and visible phosphor surfaces for cracks, peeling, dark patches, or uneven discoloration. Look for a sharp blue spot near the LED alongside a less blue appearance at the edge. That pattern can suggest uneven conversion, though lens shape and viewing angle can also affect what you see. Avoid opening an energized fixture.
Compare the suspect light with nearby units under similar conditions. A handheld spectrometer can measure spectral output and color coordinates; visual judgment is only a starting point. Dirt or a damaged optic may change how light is distributed, but it does not always explain a blue shift. I would not call the cause from one glance. Record the fixture’s appearance and operating conditions, then have qualified maintenance staff inspect the phosphor and optics.
| Observation | Likely explanation | What to inspect | Useful check | Interpretation |
|---|---|---|---|---|
| One fixture appears distinctly blue compared with nearby lights. | Less blue pump light may be converted to broad-spectrum white light if the phosphor layer is damaged, displaced, or missing. | With power isolated, examine the LED packages for cracked, chipped, uneven, or visibly absent phosphor material. | Compare the affected fixture with a nearby fixture of the same type under similar viewing conditions. | A visible difference is a clue, not proof; confirm with an appropriate optical measurement. |
| A blue or violet tint is strongest in part of the illuminated area. | Uneven phosphor coverage, package damage, or variation in the LED array may cause non-uniform color. | Check whether the color shift follows individual LED packages or appears across the whole emitting surface. | Inspect the fixture from multiple angles and compare the light pattern on a neutral surface. | A localized pattern can help distinguish package-level damage from an overall color shift. |
| The light looks unusual through a cloudy, yellowed, or damaged cover. | A lens or cover can alter light transmission and distribution; dirt, haze, or damage may also make the output appear uneven. | Inspect the lens, cover, seals, and reflector for dirt, discoloration, cracks, moisture, or delamination. | Compare the appearance before and after cleaning only when the fixture is safely de-energized and cleaning is permitted. | If the color remains after the optical surface is clean, investigate the LED package and driver as well. |
| Several fixtures in an area look similarly blue or purple. | The fixtures may use a cooler nominal color temperature, or the appearance may be affected by viewing conditions or camera settings. | Check the fixture specification and compare units of the same model in person, rather than relying only on photographs. | Use a calibrated color meter or spectroradiometer where a reliable color assessment is needed. | A camera can exaggerate or shift color because of white balance, exposure, and image processing. |
| The color changes or flickers while the fixture is operating. | An unstable driver, electrical connection, or thermal condition may affect light output; color change alone does not identify the fault. | Have a qualified technician check the driver, wiring, operating temperature, and LED module condition. | Record whether the symptom changes with warm-up time, dimming, or supply conditions. | Electrical testing should be performed by qualified personnel using appropriate safety procedures. |
| A measurement shows a stronger blue peak and reduced broad visible output. | This pattern can be consistent with reduced blue-to-white conversion, but other component or measurement issues are possible. | Measure the spectral power distribution and compare it with a known-good equivalent fixture under the same conditions. | Use a calibrated spectroradiometer and document measurement distance, angle, and ambient conditions. | A spectrum provides stronger evidence than visual judgment; interpret it against the fixture specification. |
Safety note: Do not open or service an energized street-light fixture. Isolate power and follow applicable electrical and access procedures; use a qualified technician for internal inspection or testing.
Purple or blue street lighting needs measurement, not a phone photo. Camera white balance, wet pavement, and nearby signs can distort perceived color. A high correlated color temperature (CCT) often appears cooler or bluer, while a negative Duv can shift light toward pink or purple. Look for both values in the luminaire’s test report.
IES LM-79-19 describes testing complete solid-state lighting products for electrical and photometric performance. A qualified laboratory can report spectral data, CCT, chromaticity coordinates, and Duv after the luminaire stabilizes. Compare the measured x,y coordinates with the chromaticity quadrangle for the stated CCT in ANSI C78.377-2017. Its published bins cover nominal CCTs such as 2700 K, 3000 K, 4000 K, and 5000 K. A 4000 K label alone is not a precise color specification.
Check the original LM-79 report, not only a catalog sheet. DOE CALiPER product-testing reports also publish measured performance data, including chromaticity and efficacy, illustrating why laboratory results matter more than labels alone. If coordinates fall outside the applicable ANSI bin, investigate LED variation, optical materials, or driver-related changes. If they fall inside, the source may still look different under field conditions. Standards bins do not capture every observer’s perception. That part is imperfect. A useful field check records the luminaire model, operating temperature, nearby light sources, and measurement instrument alongside the laboratory data.
A purple or blue cast does not automatically mean the LED driver has failed. Excessive output current can change LED junction temperature and color, while prolonged heat may accelerate phosphor aging. Check the driver’s rated output current and voltage against the luminaire’s service documentation. A qualified technician can measure output under stable operating conditions and compare it with the stated limits. Do not raise or lower current by guesswork. Small adjustments can affect both color and component life.
Thermal checks matter just as much. Let the light run until temperatures stabilize, then measure the driver case and LED board at the specified points. Compare readings with the manufacturer’s maximum limits, and note ambient temperature, blocked vents, dust, and loose thermal connections. A warm evening and a sun-heated pole can skew results. One reading is not the whole story. Repeat measurements if conditions change, and record them; field readings can be imperfect. If current and temperature meet specification, inspect other causes, such as a damaged phosphor layer, mismatched replacement module, or colored lens. Avoid opening energized equipment.
Compare measured driver current and temperatures with the limits in the specific fixture’s manufacturer datasheet. The chart shows illustrative readings as a percentage of those limits; 100% represents the listed limit.
Readings below the limits do not rule out an optical issue. If the light still looks purple or blue, check for uneven color across the fixture and have its color temperature and LED condition assessed.
Illustrative example only—not universal operating limits. Actual limits vary by fixture and component.
Many white LEDs use a blue chip with a phosphor layer. The blue peak often falls near 440–460 nm. A stronger blue appearance does not automatically mean the lamp has failed.
Measure its spectral power distribution with a calibrated spectroradiometer. Compare it with a nearby neutral-looking fixture at the same distance and angle. Small measurement errors matter.
A sharp peak near 450 nm is common in many designs. If it looks unusually strong beside weaker phosphor output, the fixture may appear bluer. One reading can mislead.
No. Camera white balance, nearby surfaces, and viewing conditions can change the apparent color. Look closely, but do not rely on the photo alone.
With the light switched off, check the lens and visible phosphor surfaces for cracks, peeling, dark patches, or uneven discoloration. A blue spot near the LED may be a clue, not proof.
Dirt, aging, and damaged optics can alter the light’s appearance or distribution. They may not explain a blue shift by themselves. The cause can remain uncertain.
Note the fixture’s correlated color temperature, measured spectrum, appearance, and operating conditions. Clean the lens and repeat the measurement. The evidence may still be imperfect.
Ask qualified maintenance staff to inspect the phosphor and optics if measurements or visible damage raise concern. Avoid opening an energized fixture.
Why do some LED street lights look purple or blue? Start by determining whether the color is visible to the eye or appears only in photographs. Cameras can shift colors because of their sensors, exposure settings, or image processing, so compare the light in person and in multiple images before assuming the fixture has changed. If the tint is visible directly, the LED’s spectral output may contain a pronounced blue peak, often around 440–460 nm, or the light may be producing less balanced white than intended.
Next, inspect the LED’s phosphor layer and optical components. Aging, damage, contamination, or uneven conversion of blue light into broader white light can affect the apparent color. Measurements provide a clearer diagnosis: compare the fixture’s output with relevant IES LM-79 test data and ANSI C78.377 chromaticity bins. Also check driver current and operating temperature against the manufacturer’s specified limits, since conditions outside those limits can influence color and performance. These steps help distinguish a camera artifact from a genuine change in the light source.

Penelope Light