Why Does My Solar Street Light Not Turn On?

Time:2026-10-14 Author:Isabella
0%

A solar street light that stays dark can create an immediate safety concern. The cause may be simple, such as a covered panel, a switched-off unit, or a depleted battery. However, faults can also involve wiring, the controller, the LED lamp, or moisture inside the housing. A careful inspection helps prevent unnecessary part replacement and protects the system from further damage.

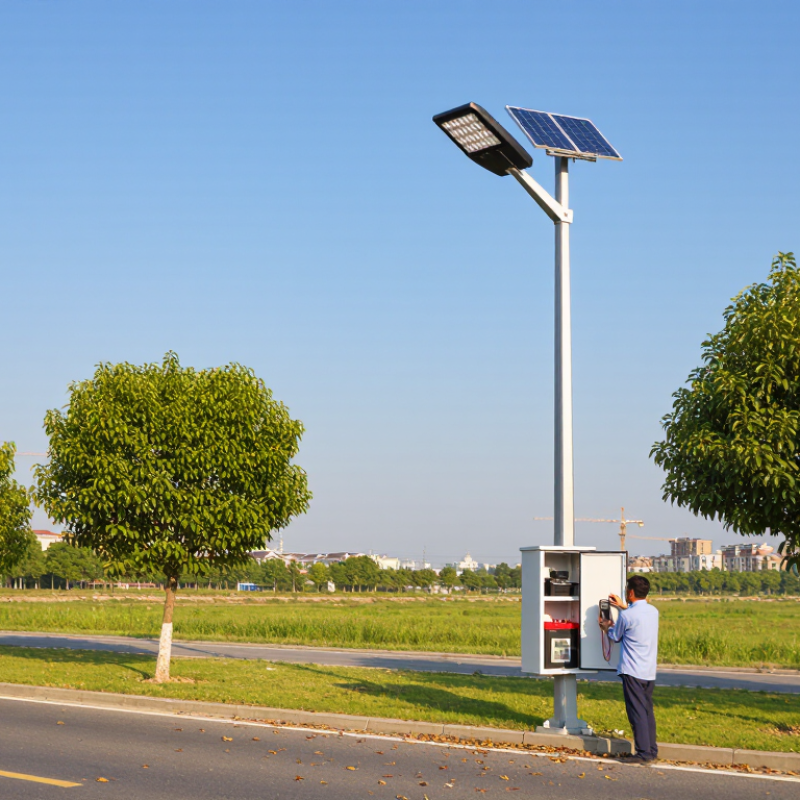
How to troubleshoot a solar street light that won't turn on? Start by checking the power switch and removing any protective film, dust, leaves, or bird debris from the solar panel. Inspect the panel during daylight, then test the lamp after covering it completely to imitate nighttime conditions. Look for loose connectors, corroded terminals, cracked cables, and water marks around the battery compartment. A multimeter can help verify battery voltage, but readings should match the manufacturer’s specifications. Do not guess.

The battery may appear normal and still fail under load. That detail is easy to miss. In my experience, rushed troubleshooting often blames the LED module before checking charging conditions. Nearby trees, new construction, or seasonal shadows can reduce charging time. The light may also be operating correctly but using a timer or motion sensor setting that limits illumination. Record what happens each evening, including weather, brightness, and operating hours. This simple evidence can reveal a pattern. If wiring is damaged or the battery is swollen, stop testing and contact a qualified technician. Some diagnoses remain uncertain without internal testing. That is worth admitting.
Why Does My Solar Street Light Not Turn On?

Common Reasons a Solar Street Light Fails to Turn On

Why Does My Solar Street Light Not Turn On?

Common Reasons a Solar Street Light Fails to Turn On

A solar street light may stay dark because its battery has insufficient charge. Dust, bird droppings, or nearby trees can reduce panel output during the day. Several cloudy days may also leave the battery below its operating voltage. Check the panel surface and measure its charging voltage in sunlight. Do not judge performance by appearance alone.

The battery may be aged, disconnected, or damaged by repeated deep discharge. Loose terminals and corroded connectors are common, especially in humid or coastal locations. A controller fault can also stop charging or prevent the lamp from receiving power. Inspect indicator lights, cable connections, and the battery voltage with a suitable meter. Replace damaged parts only with matching specifications.

The light sensor may be confused by nearby lamps, reflective walls, or incorrect settings. Some controllers use a timer, so the lamp may activate later than expected. Confirm the operating mode and cover the sensor briefly during testing. This test is useful, but it is not perfect. A faulty sensor can still produce a misleading response. Water inside the lamp housing, broken LED wiring, and incorrect installation angles require closer inspection. Have a qualified technician test battery current and controller output when basic checks reveal nothing.

How to Check the Solar Panel and Daylight Sensor

Why Does My Solar Street Light Not Turn On?

How to Check the Solar Panel and Daylight Sensor

A solar street light may seem faulty when its daylight sensor is working normally. Test it after sunset, not beneath an afternoon sky. Cover the sensor with thick, opaque cloth for two minutes. If the lamp turns on, the sensor probably detects darkness correctly. Test it carefully. A hand can leave small gaps and produce a false result.

Inspect the solar panel during full daylight. Look for dust, bird marks, standing water, cracks, or shade from a branch. Clean the surface with water and a soft cloth, then let it dry completely. Make sure the panel receives direct sunlight for several hours. Nearby walls may reduce charging, even when the panel looks bright. I once suspected a failed sensor, but a seasonal shadow caused the problem. This check is not perfect.

Examine the cable and connectors for looseness, damaged insulation, or green corrosion. Do not short the terminals during testing. If you use a meter, follow the unit’s service instructions and keep the probes steady. Avoid opening sealed battery parts without suitable training. After cleaning, leave the light in direct sun for one full day. Repeat the covered-sensor test that night. If it still stays dark, the battery, controller, or wiring may need professional inspection.

How to Inspect the Battery, Wiring, and Power Connections

Why Does My Solar Street Light Not Turn On?

A dark solar street light often has a simple electrical cause. Check the battery first, especially after several cloudy days. The IEA PVPS Trends 2024 report recorded more than 400 GW of new solar capacity worldwide in 2023. More installations also mean more field batteries requiring careful maintenance.

Turn the light off before inspecting connections. Look for loose terminals, corrosion, cracked insulation, or water near the controller. A multimeter can reveal useful clues. Measure the battery voltage at night, then check the solar panel voltage in direct sunlight. A very low battery reading suggests aging cells, poor charging, or a damaged fuse. If the panel produces no voltage, inspect its cable and connector. Do not assume the panel is faulty. I have seen a clean panel fail because one pin had backed out.

Tips: Cover the panel briefly during daytime testing. Confirm whether the controller detects darkness. Remove dirt from terminals with a dry, suitable brush. Replace swollen or leaking batteries safely. The U.S. Department of Energy’s solar operations guidance stresses scheduled inspections because small connection faults can reduce system availability. Still, inspection intervals should match local dust, rain, and temperature conditions. A monthly check may be excessive in a clean area, yet insufficient beside a busy road. Record voltage readings, weather, and repair dates. That record makes the next diagnosis less guesswork.

Why Does My Solar Street Light Not Turn On?

Typical voltage reference checks for inspecting the battery, wiring, and power connections

For a typical 12 V solar lighting system, a fully charged battery measures about 12.6 V at rest, while approximately 12.0 V indicates a low battery. A 12 V solar panel commonly produces about 18–22 V in bright sunlight when measured without load. A reading far below these reference values may indicate insufficient sunlight, a damaged battery, loose wiring, corroded terminals, or a faulty charge controller. Always compare measurements with the specifications of the installed system.

How to Test the LED Lamp and Control Components

Why Does My Solar Street Light Not Turn On?

Start testing at dusk, when the solar panel no longer receives direct sunlight. Check the lamp’s switch, wiring plugs, and battery compartment for loose connections, moisture, or corrosion. A small amount of rust can interrupt the circuit. Use a multimeter to measure the battery voltage, following its correct polarity. A very low reading suggests deep discharge, battery damage, or poor charging during the day.

Do not short the terminals. Wear insulated gloves and disconnect power before tightening wires.

Test the LED lamp separately with the controller disconnected. Use the meter’s diode mode only if it supports the lamp’s electrical design. Otherwise, inspect the LED board for dark spots, cracked solder joints, or burnt components. Never connect an unknown voltage directly to the LED. That can destroy it quickly.

Cover the solar panel with an opaque cloth during daytime testing, simulating darkness and checking whether the controller sends power to the lamp. Some controllers include a delay, so wait several minutes.

A working battery does not prove the controller works. Measure voltage at the controller’s input and LED output, then compare the readings with the equipment specifications. I once blamed a failed lamp, but a loose negative terminal caused the problem. Testing order matters.

Still, outdoor faults can be intermittent. Repeat the checks after rain or a full charging cycle, and replace damaged seals before returning the light to service.

When to Repair, Replace, or Seek Professional Assistance

Why Does My Solar Street Light Not Turn On?

When a solar street light stays dark, check simple causes before replacing parts. Cover the panel during daylight and inspect whether the lamp responds. Clean dust, leaves, and bird residue from the panel surface. Then examine the battery compartment for corrosion, swelling, loose connectors, or water marks. A battery may look normal but still hold little charge. Measuring voltage with a suitable meter gives better evidence than guessing.

Repair is reasonable when the problem involves a loose wire, dirty panel, damaged connector, or misaligned sensor. Tighten connections only after isolating the power source. Replace the battery when it has lost capacity, especially if the light works briefly after a sunny day. A cracked panel, burned controller, or badly corroded housing may cost more to repair than replace. Check the product’s technical specifications before choosing a compatible component.

Not every fault is obvious. I once blamed the battery, but a shaded panel caused the poor charging. That mistake wasted time. If the light remains off after a full charge, professional assistance is safer. Seek a qualified technician for internal wiring, repeated water entry, unstable mounting, or electrical testing at height. Do not open sealed units casually. Record the weather, operating hours, and visible symptoms before requesting service. Small details help identify the real fault.

Why Does My Solar Street Light Not Turn On? - When to Repair, Replace, or Seek Professional Assistance

Observed Condition Most Likely Cause Safe Checks to Perform Recommended Action Typical Decision When to Seek Professional Assistance
No light at night, but the unit worked previously Dirty or shaded solar panel, depleted battery, loose connection, or faulty light sensor Clean the panel with water and a soft cloth; check whether nearby trees, buildings, or dirt block sunlight; confirm the power switch is on Allow one or two sunny days for charging after cleaning and removing simple obstructions Repair or maintain If the light remains off after adequate sunlight and basic checks, have the battery, controller, and wiring tested
Light operates for only a short time after sunset Battery capacity has declined, charging time is insufficient, or the panel receives limited sunlight Observe the panel’s direct-sun exposure; compare runtime after several clear days; inspect for corrosion or damaged cables Improve panel exposure and clean the panel; replace the battery if it no longer holds charge Usually repair Use a qualified technician when battery specifications, polarity, or enclosure access are uncertain
Light never turns on after installation Protective switch remains off, transport tab is installed, wiring is incorrect, or the panel is detecting daylight Check the installation instructions; test the unit at night or cover the panel briefly; verify visible switches and connectors without opening sealed parts Activate the unit correctly and allow the battery to receive a full charge before judging performance Commissioning check Request professional installation support if wiring, mounting, or electrical testing is required
Light flashes, flickers, or changes brightness Loose connector, moisture intrusion, unstable controller, or battery voltage dropping under load Look for visible water, corrosion, cracked covers, or loose external cables; switch the unit off before handling accessible connectors Stop use if water or exposed conductors are present; replace damaged weather seals or defective components Repair promptly Seek professional assistance for moisture inside the enclosure, repeated flickering, or electrical faults
Solar panel is cracked, severely discolored, or physically damaged Impact, hail, weathering, or long-term ultraviolet exposure Visually inspect from the ground; do not touch broken glass or climb the pole without proper equipment Replace the panel or the complete light assembly if compatible replacement parts are unavailable Repair or replace A qualified professional should assess elevated equipment, broken glass, wiring, and structural safety
Battery is swollen, leaking, hot, or has a strong unusual odor Battery failure, overcharging, physical damage, or excessive heat Do not open, puncture, squeeze, or recharge the battery; keep people away from damaged equipment Isolate the equipment only if it can be done safely and arrange compliant battery removal and replacement Urgent replacement Seek professional assistance immediately; damaged rechargeable batteries can present fire and chemical hazards
Light output is noticeably dimmer but the lamp still turns on Dirty lens, LED aging, low battery voltage, poor charging, or an incorrect operating mode Clean the lens and panel; check for shading; compare performance after several sunny days; review available operating settings Clean and adjust first; replace the battery or LED module if testing confirms degradation Maintain or repair Obtain technical testing when brightness remains low after cleaning and a full charge
Unit has reached the end of its expected service life and several parts are failing Combined aging of the battery, LED module, controller, seals, and solar panel Review maintenance history, failure frequency, physical condition, and availability of compatible replacement parts Compare the cost and reliability of component repairs with a complete replacement Consider replacement Use a professional assessment for pole-mounted systems, public pathways, or units with recurring electrical problems
Light is near a road, walkway, or public area and remains off Loss of required illumination caused by electrical failure, physical damage, obstruction, or control-system malfunction Perform only ground-level visual checks; avoid opening equipment or working near traffic, overhead lines, or unstable structures Keep the area safe and report the outage to the responsible maintenance service Professional service recommended Arrange qualified maintenance when public safety, elevated work, traffic control, or electrical isolation is involved

Safety note: Turn off the system before handling accessible components. Do not work at height, handle damaged batteries, or open sealed electrical enclosures unless you are qualified and have the required safety equipment.

FAQS

Why might a solar street light stay off during the day?

The daylight sensor normally keeps the lamp off under bright sunlight. Test it after sunset.

How can I test the daylight sensor safely?

Cover the sensor with thick, opaque cloth for two minutes. The lamp should turn on if darkness is detected. Small gaps can create false results.

What should I inspect on the solar panel?

Look for dust, bird marks, standing water, cracks, and branch shadows. Nearby walls can also reduce charging.

How should I clean the solar panel?

Use clean water and a soft cloth. Remove leaves and residue gently. Let the surface dry completely.

How much sunlight does the panel need?

Leave the panel in direct sunlight for several hours. After cleaning, allow one full sunny day before retesting.

What cable problems can cause darkness?

Check for loose connectors, damaged insulation, and green corrosion. Keep meter probes steady. Never short the terminals.

When should the battery be replaced?

Consider replacement when the lamp works briefly after a sunny day. A battery may look normal but hold little charge.

When should I seek professional assistance?

Seek qualified help for internal wiring, repeated water entry, unstable mounting, or testing at height. Do not open sealed battery parts casually.

Should I repair or replace a damaged component?

Loose wires, dirty panels, and misaligned sensors may be repairable. A cracked panel or burned controller may justify replacement.

What information should I record before requesting service?

Record the weather, operating hours, charging conditions, and visible symptoms. Small details matter. My first diagnosis may be wrong.

Conclusion

A solar street light may fail to turn on because of insufficient sunlight, a dirty or damaged solar panel, a faulty daylight sensor, a weak battery, loose wiring, or a problem with the LED lamp or controller. How to troubleshoot a solar street light that won't turn on? Begin by checking whether the panel receives direct sunlight and cleaning its surface. Then inspect the sensor for blockage or damage and examine the battery, cables, connectors, and power terminals for corrosion, looseness, or visible wear.

If the power connections are secure, test the battery’s condition and confirm that the LED lamp and control components respond correctly. A temporary shadow test may help determine whether the daylight sensor is working. Replace worn batteries, damaged wiring, or defective lamps when appropriate, but avoid unsafe electrical work. If the fault remains unclear, the unit shows internal damage, or testing requires specialized tools, seek assistance from a qualified technician. Regular cleaning and scheduled inspections can also prevent repeated failures.

Isabella

Isabella

Isabella is a dedicated marketing professional with a sharp focus on driving brand growth and engagement through strategic content creation. With an extensive background in digital marketing, she combines her passion for storytelling with her keen understanding of industry trends to deliver......